
Hello 4A families,
As I shared in a previous post, your children have begun a meaningful journey of writing and sharing a Bible-based sermon.
Students are asked to choose a Bible story and focus on two key elements:
- Retelling the story accurately and clearly
- Discussing the meaning and lessons of the story
Some students may choose to include personal connections or experiences, but that is not required at this stage. Our primary goal is that, with structured support over the next few weeks, each student is able to faithfully and engagingly communicate a Bible story and identify its key learnings.
To support learners, I am breaking this project into a series of checkpoints with due dates, so I can guide students closely and ensure everyone is on track at a healthy pace.
📍 Checkpoint #1 — Due Tuesday, May 5
Students have been asked to:
- Choose a Bible story
- Identify the Scripture reference(s)
- Create a story outline
This week, we discussed how some Bible stories appear in multiple books of the Bible, and why it is important for students to return to Scripture and read it for themselves. They are also welcome and encouraged to explore other supports such as children’s Bible storybooks, conversations with parents, or input from pastors and trusted adults.
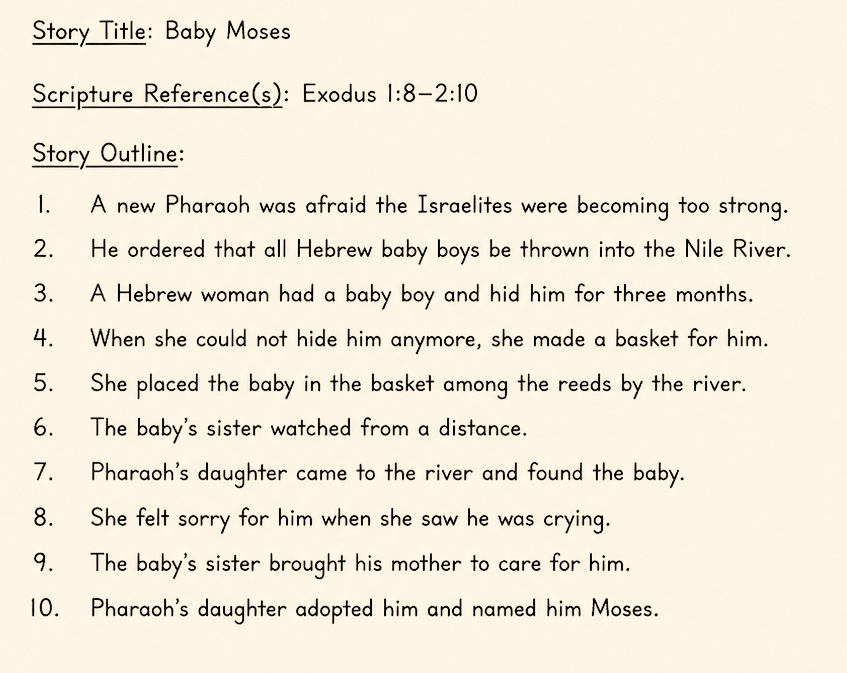
Students are encouraged to choose a story that is manageable in length. For example, rather than covering the entire life of Moses, it may be best to focus on a specific part of their story (such as the story of baby Moses).
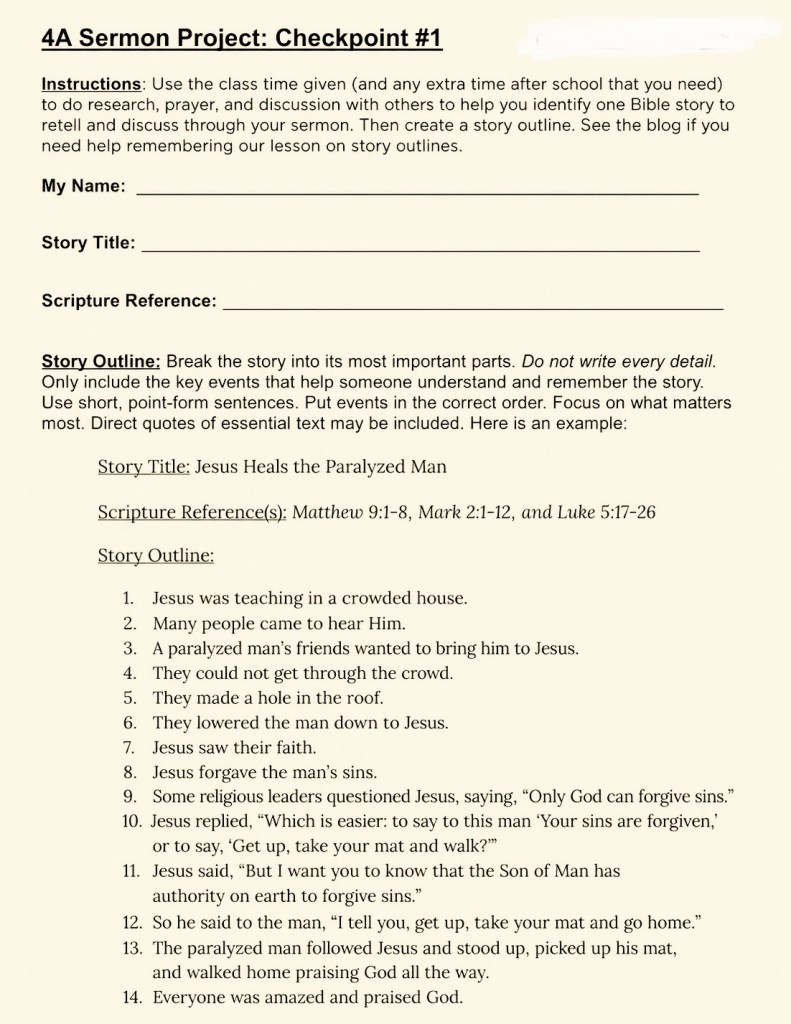
What is a “story outline”?
A story outline is:
- Not the full Bible text
- Not a detailed retelling
Instead, it is a simple breakdown of the key events, in order—almost like a traffic incident report of what occurred.
Students should aim for:
- 8–12 key points (perhaps up to 20 for longer stories)
- Clear, sequential steps that capture the main events
Keeping the outline simple will help them significantly in the next phase.
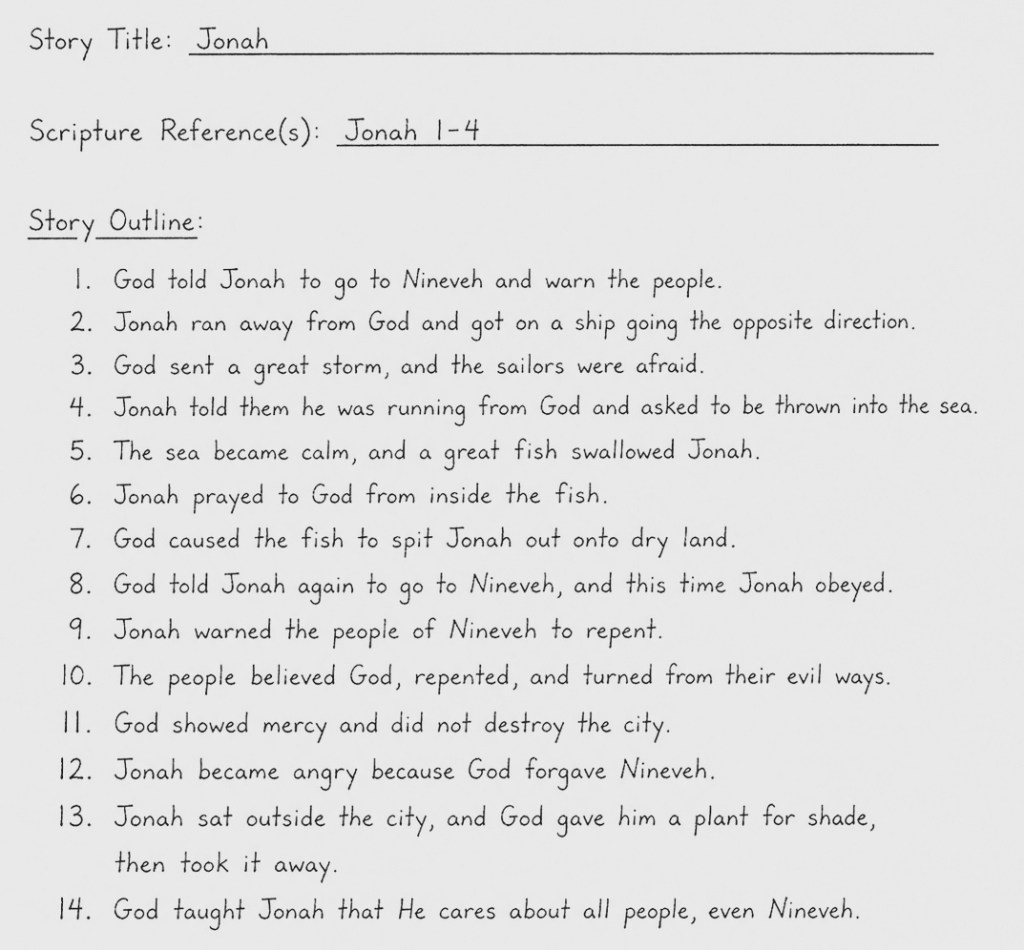
Here are two examples:
What comes next?
Once students have their story outlines, we will begin working on memorization techniques, including:
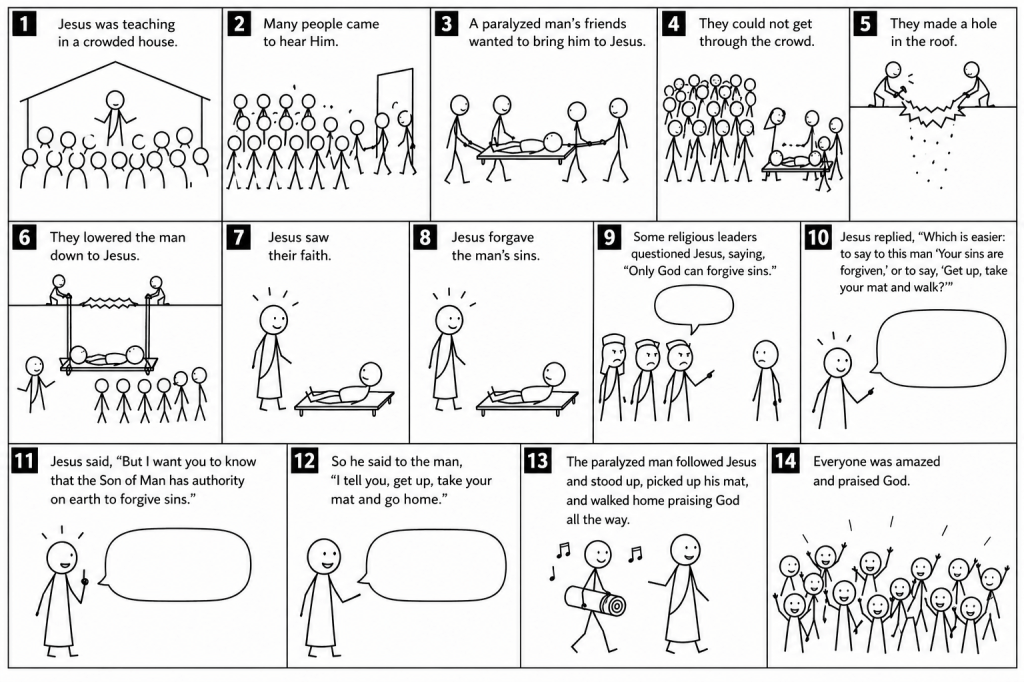
- Creating simple stick figure drawings for each step (storyboard)
- Acting out the story with exaggerated actions to build a kinesthetic connection
- Speed retellings for automaticity
This approach to breaking down a Bible story was inspired by a Bible storytelling course I took called the Story the Bible Online Comprehensive Course (STBOCC). It had a profound impact on how I learn, remember, and communicate Scripture, and I’m excited to bring these strategies into our classroom.
If you’re curious to learn more, here is the course link: https://wycliffe.org.au/events/stbocc/
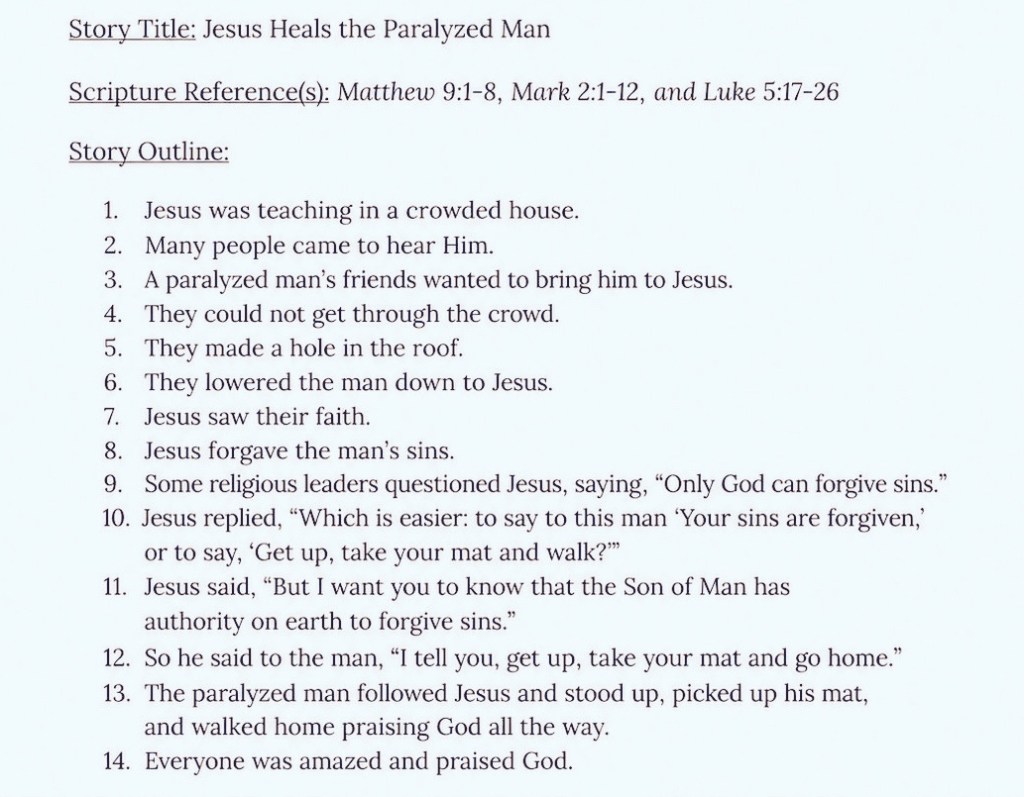
Below, you’ll find an example:
- A video of me telling the story of Jesus healing the paralyzed man
- Followed by a story outline of the same passage, showing how it is simplified into key steps
Example of briefly retelling a Bible story…
Example of the Bible Story Outline…
PREVIEW: Coming up next week, checkpoint #2 will teach students to make a simple stick figure storyboard for their Bible Story…
No need to start this storyboard yet—I need to teach the full lesson on this first. But I thought it could be helpful to see what the story outline will be used for next.
“Declare His glory among the nations, His marvellous deeds among all peoples.”
– Psalm 96:3
